

Cutting Tool Design For A Wedding Tag
This Design Tutorial + Your Creativity = Endless Possibilities!
Please enable
JavaScript to see the video
This design tutorial was inspired by Infarrantly Creative's Five Ways to Make Unique Business Cards. As we've made a habit of playing with paper around here and are always looking for new things to do, we were inspired to make mini card designs of our own.
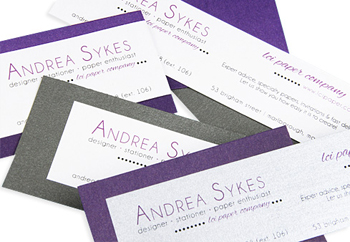
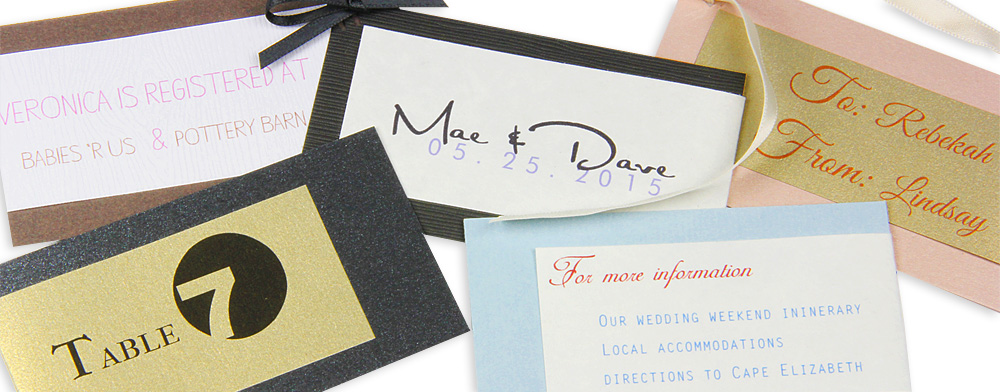
This tutorial features a printed top layer that wraps around the front and back of the mini card. Our template provides for essential business card information, but clearly this mini card design would also make for great favor & gift tags, place cards or additional information cards (think wedding websites and registries). With our design and your creativity, the list is endless!
The tutorial walks you through cutting & printing, includes a materials list, and step by step instructions for assembly. Use it to make something great, and when you're done, we hope you'll share too!
Let's get started!
Materials You'll Need
- 8 1/2 x 11 paper – cover weight* or pre-cut business or mini cards
- 8 1/2 x 11 paper – text weight* – for printed top layer
- Paper cutting tool of choice
- Glue or double sided tape
* To select text or cover weight, refine by weight in the Place Order box.
1. Download Templates File
Begin by downloading a zip file of templates using the link below. The file includes 2 templates, sized 8 1/2 x 11:
- Cutting guidelines for 2 x 3 1/2 inch business cards (should you not use the pre-cut business cards)
- Printing template/cutting guidelines for 1 1/2 x 6 inch printed strips
Download Business Card Templates
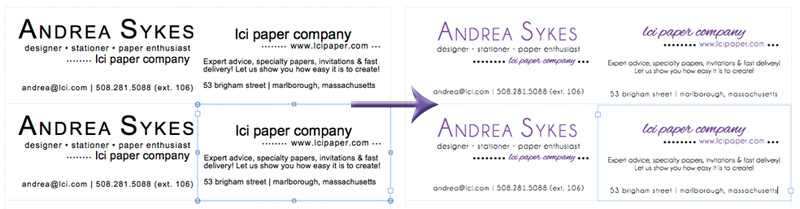
2. Customize Text in Printing Template
This template consists of seven tables measuring 1 1/2 x 6 inches. Within each table, there are two text boxes that are 3 inches wide each. To edit the text, simply click in the appropriate text box.
In the template, change the sample text to your own text and experiment with fonts and colors until you find a look you like.
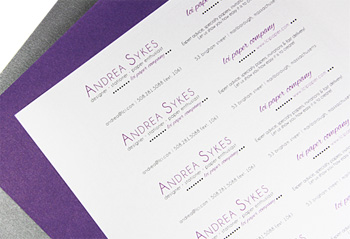
3. Print Strips
When your text is customized, print the strips. Since this document measures 8 1/2 x 11, no custom size set up is necessary.
Note about table outlines: The faint table outlines will print out to be used as cutting guidelines in the next step. If you wish, you can turn them off by clicking Table Properties >> Borders and Shading >> None. You can also make them darker in the same menu, if you wish.
4. Cut (10) 2 x 3 1/2 Inch Cards from (1) 8 1/2 x 11 Sheet of Card Stock
(If Not Using Pre-Cut Business Cards)
Using the downloaded cutting guidelines or the built in measurement on your paper trimmer, cut (10) 2 x 3 1/2 inch cards from (1) 8 1/2 x 11 inch sheet.
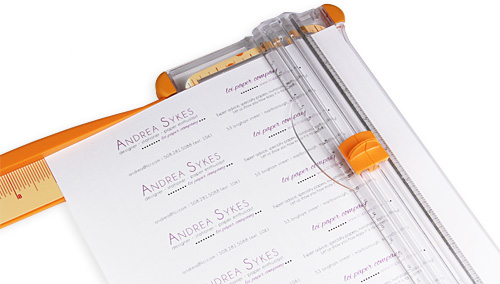
5. Cut (7) 1 1/2 x 6 Inch Strips from (1) 8 1/2 x 11 Sheet of Text Paper
Next, cut the strips you printed using your paper trimmer of choice.
6. Fold 1 1/2 x 6 Inch Strips in Half at 3 Inches
Fold each 1 1/2 x 6 inch strip in half at 3 inches so that it can be evenly folded around the front and back of the business card.
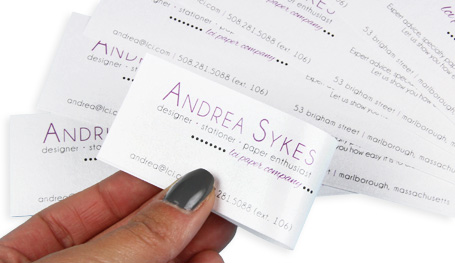
7. Wrap Strips Tightly Around Cards
Wrap one strip tightly around each card, being careful to keep it straight and centered from top to bottom.
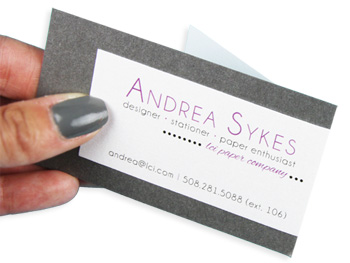
8. Adhere Strips to Cards
Wrap each strip tightly around the card and adhere. We used doubled sided tape here because it includes no drying time and tightly adheres without wrinkling the paper for a professional look.
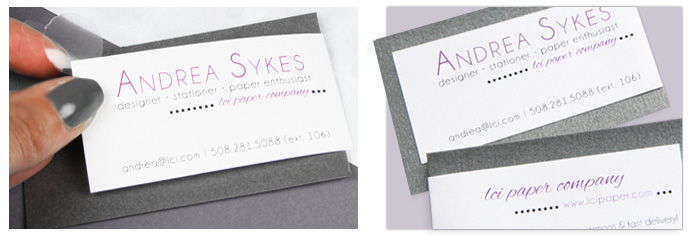
What Will You Make?
That's all there is to it! What will you make using this design idea? We'd love to see it! Post a picture on the LCI Facebook page!
Cutting Tool Design For A Wedding Tag
Source: https://www.lcipaper.com/kb/mini-cards-favor-tags-to-business-cards.html
Posted by: cornwellhimiland.blogspot.com
0 Response to "Cutting Tool Design For A Wedding Tag"
Post a Comment